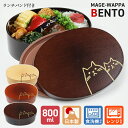
Start with a lunch box that holds the amount you normally eat. Then check whether you can wash it every day and reheat your food where you have lunch. If you carry it in a bag, make sure it fits upright with its base flat.
Pay particular attention to the words "microwave safe." The container may be suitable for reheating while its lid must be removed. To judge how easy a box is to clean, look beyond the shape of its main container. Think about washing and drying the lid, inner lid, and sealing gasket as well.
The following order helps you narrow down your options and find the details that matter in a product description.
| What to consider | What to check | Before buying |
|---|---|---|
| 1. Capacity | Will it hold your usual rice and side dishes? | Check the capacity of your current container and whether its portions leave you satisfied. |
| 2. Cleaning | Can you remove, wash, and dry the parts? | Look for photos showing the separate parts or read the care instructions. |
| 3. Reheating | Which containers and lids can go in the microwave? | Read the restrictions, including any heating time limits. |
| 4. Carrying | Will it fit in your bag, with suitable protection against leaks? | Check the outside dimensions and whether it can carry liquids. |

Choose a capacity that fits your usual lunch
Use size guides as a starting point, then adjust for your appetite
If you are unsure about capacity, check the lunch box or food container you already use. Choose a similar size if it holds enough food, or consider something slightly larger if you often finish lunch still hungry.
Buying your first lunch box? Try packing your usual meal into a food container you have at home. Include the side dishes as well as the rice to get a useful sense of the space you need.
Manufacturers' capacity guides may suggest sizes such as 600 mL or 800 mL for adults. Your appetite, activity level, and the rest of your lunch all affect how much space you need. Compare these guides with your own portions rather than choosing by age or gender alone.
When sizing up, work out which part of the meal needs more room. If a 600 mL container does not hold enough rice, a larger rice compartment is one option. If the side dishes do not fit, you need more room in their compartment or tier. A greater total capacity may leave the same problem if the section you want to enlarge stays small.
If you carry rice balls separately, your lunch box mainly needs to hold the side dishes. For a rice bowl meal or noodles packed in one container, check that it has enough depth for the toppings. The way you put lunch together affects the capacity you need.
A larger box gives you room to adjust portions, but food can move around when you pack only a small amount. If your appetite varies from day to day, consider adding a small separate container when needed, or choosing a two-tier box that can also be used with just one tier.
Two 600 mL boxes can feel different to pack
A single-tier box lets you arrange rice and side dishes side by side. You can see the whole meal when you open it and adjust how much space each dish takes up. If you also plan to use it for rice bowl meals, check whether the divider comes out.
A two-tier box is an option if you prefer separate containers for rice and side dishes. Check the capacity of each tier, though. The total may look right while the rice compartment is smaller than expected. Look for a breakdown such as 250 mL in the upper tier and 350 mL in the lower tier.
Deep containers suit layering food or arranging pieces upright. For a shallow, wide box, picture grilled fish or slices of rolled omelet laid out flat. Think about the dishes you usually make to see differences that the capacity figure cannot explain.
Some boxes have a domed lid. Check whether the stated capacity includes the space beneath it. A photo of food piled high does not necessarily show the amount represented by the capacity on the label.


Check what it takes to disassemble, wash, and dry the box
To reduce the work of cleaning up after you get home, look at how many parts there are and how each one needs to be washed. A box with one main container may still have a lid, inner lid, divider, and gasket to remove and clean separately.
In a shop, inspect the underside of the lid and the inside corners where possible. Online, look beyond the closed-box photos for images of the separate parts and the care instructions.
Check how the gasket comes out and goes back in
If the sealing gasket must be removed for washing, it should be easy to take out and refit. If it sits deep inside a narrow groove, consider whether you can reach that groove to clean it.
Food residue can remain around the gasket. Where the design calls for removal, wash the gasket and the groove in the container or lid separately, then let them dry thoroughly before reassembling. Checking the removal instructions before buying helps you judge whether you can keep up with the daily care. Follow the product instructions for any sanitizing method, since suitable methods depend on the materials.
A lid with an integrated gasket is an option if you want fewer detachable parts. Check how to clean the area where the seal joins the lid and which part needs replacing if it becomes damaged. Gasket-free boxes are another option, but you still need to check separately whether they can carry foods with moisture or liquid.
If you want to keep using the box for years, find out whether replacement gaskets and lids are available. Keep the model number along with the product name so you can identify the correct parts.
Look inside the corners and underneath the lid
Check whether the inside corners are rounded and whether a sponge can reach them. With a long, narrow, deep container, consider whether your hand or sponge can reach the bottom.
Inspect the grooves under the lid, the bases of the latches, and any slots that hold a divider. A simple-looking box can have small recesses on surfaces that are not visible in the main product photo.
Think about where you will put the parts after washing. Is there room to spread them out to dry? Can you wipe away water left in the lid grooves? These details help you picture using the box in your own kitchen.
Check dishwasher compatibility for every part
If you use a dishwasher, check the lid, inner lid, and gasket as well as the main container. Even if you intended to wash everything together, any unsuitable parts will still need washing by hand.
Some products explicitly state that all parts are dishwasher safe. When comparing boxes, read the list of compatible parts and any notes alongside the general dishwasher label. Check for exceptions requiring lids or accessories to be hand-washed.
Dishwasher compatibility and compatibility with a separate dish-drying appliance are also worth checking individually. Find out which washing and drying methods are allowed and whether you must take the box apart first.
Read any restrictions on detergent or temperature. Check the dimensions, too, so you know whether both the container and lid will fit in your dishwasher basket.
Read "microwave safe" together with the lid instructions
If you intend to reheat lunch at work or elsewhere, first check that you can use a microwave there. Then choose a suitable box. If you have nowhere to reheat your meal, microwave compatibility does not need to be a requirement.
The container and lid may have different restrictions
"Microwave safe" does not mean every box works the same way. Some must be heated with the lid removed; others can be heated with it on. If there is an inner lid beneath the outer one, check what to do with that as well.
| Product instructions | What to do before reheating |
|---|---|
| Remove the lid before use. | Remove the specified lid and put only the approved parts in the microwave. |
| Suitable for use with the lid on. | Read the conditions for leaving it on, including any vent or latch operation. |
| Only certain containers are microwave safe. | Take out the approved inner container, for example, and keep the outer container out of the microwave. |
Do not assume that leaving a lid slightly ajar makes it suitable for microwave use. Follow the product instructions. Even if the lid can stay on, check whether you need to open a steam vent or make another adjustment.
Before buying, check the following in the instructions:
- Can the outer lid, inner lid, and divider stay in place?
- Do you need to open a steam vent or take another step before heating?
- Are there limits on microwave power or heating time?
- Can food be reheated from frozen in the container?
If the lid must come off, think about where you will put it while you eat. For a two-tier box, check how each container should be reheated.
A heat-resistance rating alone does not establish microwave suitability
Do not decide that a box can go in the microwave based only on its material or stated heat-resistance temperature. Check that the manufacturer specifically identifies that product as microwave safe.
Read any notes about heating time and food types before buying. Make sure the meals you usually bring fit those conditions. A microwave-safe label does not mean you can use any power setting or heat the contents for as long as you like.
As a general rule, keep metal lunch box bodies out of the microwave. An insulated lunch box may have different rules for its outer metal container and inner plastic containers. Even if an inner container is microwave safe, its lid may not be. Check exactly which container to take out and which parts to remove.
Match the material to how you reheat and clean your lunch box
Even if you like a material's appearance and feel, check whether it suits your daily routine. Wooden lunch boxes in particular can require different care depending on their surface finish.
| Material | How to assess it | Details to check |
|---|---|---|
| Plastic | An option when looking for microwave and dishwasher compatibility. | Which containers and lids are approved, plus heating restrictions. |
| Stainless steel or aluminum | Check first whether it will work with your plans for reheating. | Microwave restrictions, cleaning methods, and interior coatings. |
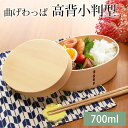
| Wood or magewappa, a traditional bentwood box | Consider whether you can follow the washing and drying instructions every day. | Surface finish, permitted detergents, and microwave or dishwasher restrictions. |
Wooden boxes do not all use the same washing method. Uncoated wood and wood finished with a coating such as urethane may need different detergents and cleaning methods. Some uncoated products specify that pH-neutral detergent should be avoided, while some urethane-coated products call for hand-washing with pH-neutral detergent and a soft sponge.
Do not apply another wooden box's care instructions simply because the two look similar. You also need to be able to wipe away moisture and let the box dry thoroughly. Some uncoated wooden products require at least a full day to dry, with use every other day recommended. If you want to pack lunch daily, check whether the box will dry by the next morning or whether you need another container to alternate with it.
For microwave and dishwasher use, check the specific product's label rather than relying on the word "wood." When choosing a bentwood box, consider its finish, washing method, and drying requirements together.

Check outside dimensions and leak protection before carrying it
A wide single-tier box and a narrow two-tier box can have the same capacity but fit very differently in your bag. Check the outside dimensions, including any handles or latches, and how much room the box will take up inside an insulated lunch bag.
Allow extra space for ice packs and a cutlery or chopstick case if you carry them together. A bag that fits the box alone might not close once you add an ice pack. When shopping online, cut a piece of paper to match the box's base and place it in your bag to get a sense of its width and depth.
Distinguish between a claim that a box resists leaks and a statement that it is suitable for carrying liquids. The presence of a gasket or latches does not establish that it can carry soup; check the product's stated uses.
Check the divider as well. A removable, flat divider should not be assumed to stop liquid from reaching the next compartment. If you plan to bring foods with plenty of liquid, one option is to use a separate container approved by its manufacturer for that purpose.
Leave space for keeping lunch cool
When carrying a conventional lunch box, think about storage until mealtime as well as the container itself. Drain excess liquid from side dishes and let cooked rice and other dishes cool thoroughly before closing the lid. Keep lunch in a cool place after arriving and eat it promptly. In hot weather or during a long journey, use an ice pack and leave enough room to pack it alongside the box in your insulated lunch bag.
If you use an insulated lunch box designed to keep food hot, follow its instructions for preheating and filling. Conventional and insulated boxes work differently, so consider how long it will be before you eat when choosing between them.
Read the product notes and instructions before making your final choice
Once you have two or three candidates, check the details that the main product photos could not show. Work through the following points while picturing your day, from packing lunch in the morning to washing up when you get home.
- Have you checked the capacity of each tier and the container's depth, as well as the total volume?
- Will your usual food fit with the lid closed comfortably?
- Can you remove, wash, and dry the gasket and divider?
- If you use a dishwasher, do any parts need hand-washing?
- If you use a microwave, do you know what to do with the outer and inner lids?
- Will the box fit upright with its base flat in your bag, alongside ice packs and cutlery?
- Do the instructions explain whether it can carry liquids and any restrictions during transport?
- Can you buy a replacement gasket or lid if one becomes damaged?
For example, if you reheat lunch at work every day and use a dishwasher at home, check the lid's microwave instructions and dishwasher compatibility for all parts first. If you carry rice balls separately, you can prioritize room for side dishes and how easily they pack. Compare the boxes against the requirements you need for your own lunch to make their differences easier to judge.